How to Wrap a Car: The Complete Vinyl Wrap Guide (DIY Reality Check Included)
Everything that goes into wrapping a car — tools, prep, panel-by-panel technique, post-heating, and the honest truth about which parts of the job DIYers can pull off.
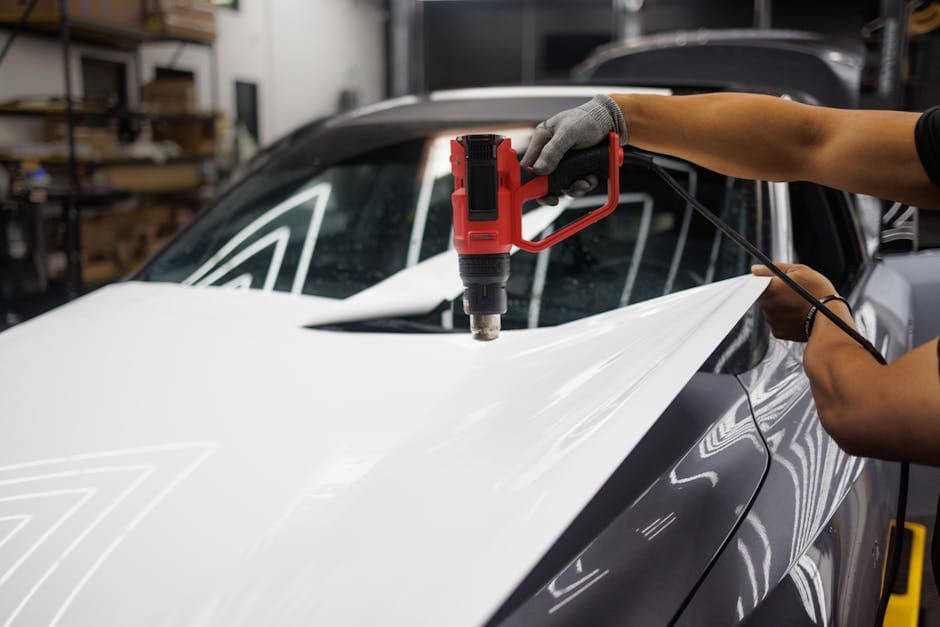
Table of Contents
Wrapping a car looks like a sticker job until you watch a pro stretch cast vinyl around a bumper without a single wrinkle. This guide covers the entire process — tools, prep, technique, and finishing — plus an honest assessment of which parts a first-timer can actually do well.
First, the Honest Part
Professional installers spend 2-3 years getting good at compound curves. A full wrap is 10-16 hours of skilled work even for them. As a first-timer you can realistically do:
- •Flat and gently curved panels — hood, roof, door skins
- •Chrome delete — window trim and badges (start here)
- •Simple partial wraps — racing stripes, panel accents
What sends first-timers to a shop with a bag of ruined vinyl: bumpers, mirrors, recessed door handles, and deep body lines. If your goal is a full color change that looks paint-quality, get quotes from professional shops — at $3,000-$3,500 for a car you're paying for thousands of repetitions you don't have. If your goal is learning the craft, read on.
The Tools (About $150-$300)
- •Squeegee with felt edge — your main tool; buy spare felt buffers, they're consumables
- •Heat gun — not a hair dryer; you need controlled heat to 80-120°C for stretching and post-heating
- •Infrared thermometer — post-heating to the film's spec temperature is what makes stretched vinyl stay put
- •Knifeless tape — cuts clean lines without ever touching the paint with a blade
- •Sharp blades — a fresh snap-off edge every few cuts, not every few panels
- •Surface prep — 70/30 isopropyl alcohol mix, lint-free towels, degreaser, clay bar for older paint
- •Gloves — nitrile or wrap gloves; fingerprints on adhesive show
The Vinyl Decision
Use cast vinyl (3M 2080, Avery Dennison SW900, KPMF) for anything with curves. It costs more ($4-$6/sq ft retail) but it conforms and stays conformed. Calendered film is cheaper and fine for flat signage — on a bumper it will lift back to its original shape within weeks. A full-size car needs about 200 sq ft including a 15% waste factor; order a few extra feet, because you will ruin a panel.
Want to see a color on YOUR car before buying a roll? Shops use Wraptor's Studio to render photorealistic wrap previews from a photo — most will happily send you a render with a quote.
Prep: 80% of a Good Wrap
Vinyl sticks to what's actually on the surface — including the wax, silicone dressing, and road film you didn't remove:
- 1.Wash with dish soap (strips wax), not car shampoo
- 2.Clay-bar anything that feels rough
- 3.Degrease, then wipe every panel with the alcohol mix and a lint-free towel
- 4.Remove what hardware you can — badges, antennas, door handles if you're capable
- 5.Work indoors, 18-24°C, out of direct sun and wind. Cold vinyl tears; hot vinyl over-stretches
Technique: The Five Rules
- 1.Let the film do the work. Cast vinyl wants to lay flat. Hold it with light tension, squeegee from the center out in overlapping strokes, and don't stretch unless the shape demands it.
- 2.Heat to stretch, then let it cool before you stick it. Stretching hot film and slapping it down locks in tension that becomes lifting edges in a month.
- 3.Never stretch more than ~25% on a panel face, and post-heat anything you stretched to the film's stated temperature (usually ~90-110°C — that's what the IR thermometer is for).
- 4.Wrap edges 5-7mm around, never trim flush on the face. Use knifeless tape for clean lines without a blade near paint.
- 5.Patience beats speed. Wrinkle? Lift the panel back, reheat gently, lay it again. Cast film forgives the patient.
Panel Order for a Full Wrap
Roof → hood → trunk → rear quarters → doors → fenders → bumpers last (they're the hardest; you'll be warmed up). Budget a weekend for your first partial panels and a very long weekend-plus for anything ambitious.
Aftercare
Don't wash for 48 hours. Hand wash after that, no pressure washer at edges, and park out of the sun when you can — proper care is the difference between a 5-year wrap and a 2-year one.
When to Call a Pro
If the job involves a bumper, your daily driver, or a deadline — hire it out. A professional install comes with a warranty, insurance, and edges you can't see. Browse rated wrap shops near you, compare their portfolios, and request quotes — the good shops respond the same day with an itemized number.
And if this guide lit the bug and you're thinking about doing this for a living: start with our guide to becoming a freelance wrap installer. The trade is short on good hands.
Whether you're getting a wrap or learning to lay one, Wraptor is where the wrap world runs — find rated shops, preview colors on your own car, or get listed as an installer. Find a shop →

Sal Lara
Founder, Wraptor
Sal runs a vehicle wrap and tint studio and built Wraptor to handle the operations work he was sick of doing in spreadsheets. Writes about pricing, materials, and shop ops from inside the trade.
▚ Keep reading · For Wrap Buyers
▚ Next steps
The Wraptor Newsletter
Pricing data, material tips, and business strategies delivered weekly.